At the tail finish of 2015, the Raspberry Pi Foundation shocked the world by releasing the diminutive Raspberry Pi Zero. What’s extra, they gave it away for free on the quilt of the MagazinePi journal. I instantly rushed out and trawled round a number of newsagents till I discovered the final two copies within the space. I wasn’t positive what I’d use them for, however I knew their small measurement would permit me to do attention-grabbing tasks that a full-sized Pi couldn’t fulfill.
Because of my curiosity in astrophotography, I had beforehand modified a Microsoft LifeCam Cinema HD webcam, stripping its case, lens, and infrared lower filter to reveal the naked CCD chip. I used it with a custom-built case instead of an eyepiece in my Celestron telescope for astrophotography. It has captured unbelievable views of Jupiter, close-ups of craters on the Moon, and sunspots on the Sun (with appropriate Baader security movie safety).
Even earlier than that, I had turned my movie SLR digicam right into a pinhole camera by drilling a gap in a physique cap (the cap that protects a digicam’s inside workings when it would not have a lens hooked up) and protecting it in a skinny disc lower from a soda can, pierced with a needle to supply a pinhole. Quite by probability, sooner or later this pinhole physique cap was sitting on my desk subsequent to the modified astrophotography webcam. I puzzled whether or not the webcam had ok low-light efficiency to seize a picture from behind the pinhole physique cap. It solely took a minute with the GNOME Cheese software to confirm that a pinhole webcam was certainly a viable thought.
From this seed of an thought, I had a method to make use of one in every of my Raspberry Pi Zeros! The pinhole cameras that folks construct are usually minimalistic, providing no controls apart from the publicity period and movie’s ISO ranking. Digital cameras, against this, have 20 or extra buttons and a whole lot extra settings buried in menus. My objective for the digital pinhole webcam was to remain true to pinhole pictures traditions and construct a minimalist machine with no controls in any respect, not even publicity time.
The digital pinhole digicam, created from a Raspberry Pi Zero, HD webcam, and empty powder compact, was the first project in an ongoing series of pinhole cameras I constructed. Here’s how I made it.
Hardware
Since I already had the Raspberry Pi Zero in hand, I wanted a webcam for this challenge. Given that the Pi Zero retails for £four within the UK, I needed different elements of the challenge to be priced equally. Spending £30 on a digicam to make use of with a £four pc board simply feels unbalanced. The apparent reply was to go over to a widely known web public sale website and bid on some secondhand webcams. Soon, I would acquired a generic HD decision webcam for a mere £1 plus delivery. After a fast check to make sure it operated accurately with Fedora, I went about stripping the case to look at the scale of the electronics.
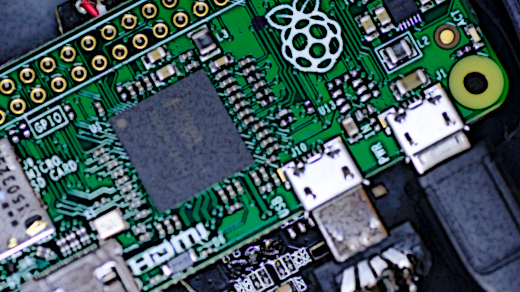
Next, I wanted a case to accommodate the digicam. The Raspberry Pi Zero circuit board is a mere 65mm x 30mm x 5mm. The webcam’s circuit board is even smaller, though it has a plastic mounting across the CCD chip to carry the lens in place. I seemed round the home for a container that will match the 2 tiny circuit boards. I found that my spouse’s powder compact was simply large sufficient to suit the Pi Zero circuit board. With a bit of fiddling, it seemed as if I might squeeze the webcam board inside, too.
I got down to strip the case off of the webcam by eradicating a handful of tiny screws to get on the innards. The measurement of a webcam’s case provides little clue in regards to the measurement of the circuit board inside or the place the CCD is positioned. I used to be fortunate that this webcam was small with a handy format. Since I used to be making a pinhole digicam, I needed to take away the lens to reveal the naked CCD chip.
The plastic mounting was about 1cm excessive, which might be too tall to suit contained in the powder compact. I might take away it totally with a pair extra screws on the rear of the circuit board, however I believed it could be helpful to maintain it to dam mild coming from gaps within the case, so I trimmed it right down to 4mm excessive utilizing a craft knife, then reattached it. I bent the legs on the LED to cut back its top. Finally, I chopped off a second plastic tube mounted over the microphone that funneled the sound, since I did not intend to seize audio.
The webcam had an extended USB cable with a full-size plug, whereas the Raspberry Pi Zero makes use of a Micro-USB socket, so I wanted a USB-to-Micro-USB adapter. But, with the adapter plugged in, the Pi would not match contained in the powder compact, nor would the 1m of USB cable. So I took a pointy knife to the Micro-USB adapter, reducing off its USB socket totally and stripping plastic to disclose the steel tracks resulting in the Micro-USB plug. I additionally lower the webcam’s USB cable right down to about 6cm and eliminated its outer sheaf and foil wrap to reveal the 4 particular person cable strands. I soldered them on to the tracks on the Micro-USB plug. Now the webcam may very well be plugged into the Pi Zero, and the pair would nonetheless match contained in the powder compact case.
Originally I believed this is able to be the tip of my electrical design, however after testing, I spotted I could not inform if the digicam was capturing photos and even powered on. I made a decision to make use of the Pi’s GPIO pins to drive indicator LEDs. A yellow LED illuminates when the digicam management software program is working, and a inexperienced LED illuminates when the webcam is capturing a picture. I linked BCM pins 17 and 18 to the optimistic leg of the LEDs through 300ohm current-limiting resistors, then linked each destructive legs to a typical floor pin.
Next, it was time to change the powder compact. First, I eliminated the internal tray that holds the powder to release area contained in the case by reducing it off with a knife at its hinge. I used to be planning to run the Pi Zero on a conveyable USB power-bank battery, which would not match contained in the case, so I lower a gap within the aspect of the case for the USB cable connector. The LEDs wanted to be seen exterior the case, so I used a 3mm drill bit to make two holes within the lid.
Then I used a 6mm drill bit to make a gap within the heart of the underside of the case, which I coated with a skinny piece of steel and used a stitching needle to pierce a pinhole in its heart. I made positive that solely the very tip of the needle poked by means of, as inserting all the needle would make the opening far too massive. I used tremendous moist/dry sandpaper to easy out the pinhole, then re-pierced it from the opposite aspect, once more utilizing solely the tip of the needle. The objective with a pinhole digicam is to get a clear, spherical gap with no deformations or ridges and that simply barely lets mild by means of. The smaller the opening, the sharper the photographs.
All that remained was assembling the completed machine. First I fastened the webcam circuit board within the case, utilizing blue putty to carry it in place so the CCD was straight over the pinhole. Using putty permits me to simply reposition the CCD after I want to wash mud spots (and as insurance coverage in case I put it within the mistaken place). I positioned the Raspberry Pi Zero board straight on high of the webcam board. To shield in opposition to electrical quick circuits between the 2 boards, I coated the again of the Pi in a number of layers of electrical tape.
The Raspberry Pi Zero was such an ideal match for the powder compact that it did not want the rest to carry it in place, in addition to the USB cable for the battery that stands proud by means of the opening within the case. Finally, I poked the LEDs by means of the beforehand drilled holes and glued them into place. I added extra electrical tape on the legs of the LEDs to stop quick circuits in opposition to the Pi Zero board when the lid is closed.
Software
Computer hardware is ineffective with out software program to regulate it, after all. The Raspberry Pi Zero can run the identical software program as a full-sized Pi, however booting up a standard Raspbian OS picture is a really time-consuming course of because of the Zero’s sluggish CPU pace. A digicam that takes greater than a minute to activate is a digicam that won’t get a lot real-world use. Furthermore, virtually nothing that a full Raspbian OS runs is beneficial to this digicam. Even if I disable all of the redundant companies launched at boot, it nonetheless takes unreasonably lengthy besides. I made a decision the one inventory software program I’d use is a U-Boot bootloader and the Linux kernel. A custom written init binary mounts the foundation filesystem from the microSD card, masses the kernel modules wanted to drive the webcam, populates /dev, and runs the applying binary.
The software binary is one other custom C program that does the core job of controlling the digicam. First, it waits for the kernel driver to initialize the webcam, opens it, and initializes it through low-level v4l ioctl calls. The GPIO pins are configured to drive the LEDs by poking registers through /dev/mem.
With initialization out of the way in which, the digicam goes right into a loop. Each iteration captures a single body from the webcam in JPEG format utilizing default publicity settings, saves the picture straight to the SD card, then sleeps for 3 seconds. This loop runs endlessly till the battery is unplugged. This properly achieves the unique objective, which was to create a digital digicam with the simplicity on par with a typical analog pinhole digicam.
The code for this tradition userspace is made accessible beneath GPLv3 or any later model. The Raspberry Pi Zero requires an ARMv6 binary, so I constructed it from an x86_64 host utilizing the QEMU ARM emulator to run compilers from a chroot populated with the toolchain for the Pignus distro (a Fedora 23 port/rebuild for ARMv6). Both binaries had been statically linked with glibc, so they’re self-contained. I constructed a custom RAMDisk containing the binaries and some required kernel modules and copied it to the SD card, the place the bootloader can discover them.
Taking pictures
With each the hardware and software program full, it was time to see what the digicam was able to. Everyone is accustomed to the wonderful high quality of photos produced by trendy digital cameras, whether or not skilled DSLRs or cellphones. It is vital to reset expectations right here to a extra life like stage. The HD webcam captures 1280×1024 decision (~1 megapixel). The CCD struggles to seize a picture from the tiny quantity of sunshine allowed by means of the pinhole. The webcam routinely will increase achieve and publicity time to compensate, which leads to very noisy photos. The photos additionally undergo from a really slim dynamic vary, as evidenced by a squashed histogram, which needs to be stretched in post-processing to get true blacks and whites.
The greatest outcomes are achieved by capturing photos exterior in daylight, as most interiors have inadequate illumination to register any type of usable picture. The CCD is barely about 1cm in diameter, and it is just some millimeters away from the pinhole, which creates a comparatively slim area of view. For instance, in a selfie taken by holding the digicam at arm’s size, the individual’s head fills all the body. Finally, the photographs are in very mushy focus, which is a defining attribute of all pinhole cameras.
Initially, I simply used the digicam to seize small numbers of nonetheless photos. I later lowered the loop delay from three seconds to 1 second and used the digicam used to seize sequences of photos over many minutes. I rendered the photographs into time-lapse movies utilizing GStreamer.
Here’s a video I created with this course of:
Video of the stroll from Bank to Waterloo alongside the Thames to unwind after a day’s work. 1200 frames captured at 40 frames per minute animated at 20 frames per second.