“How do I make plots in Python?” used to have a easy reply: Matplotlib was the one means. Nowadays, Python is the language of data science, and there is much more selection. What must you use?
This information will allow you to resolve. It will present you learn how to use every of the 4 hottest Python plotting libraries—Matplotlib, Seaborn, Plotly, and Bokeh—plus a few nice up-and-comers to contemplate: Altair, with its expressive API, and Pygal, with its lovely SVG output. I am going to additionally have a look at the very handy plotting API offered by pandas.
For every library, I’ve included supply code snippets, in addition to a full web-based instance utilizing Anvil, our platform for constructing internet apps with nothing however Python. Let’s have a look.
An instance plot
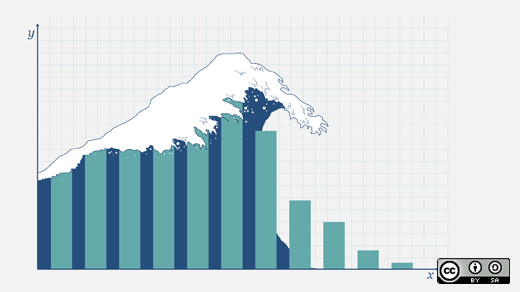
Each library takes a barely totally different method to plotting information. To evaluate them, I am going to make the identical plot with every library and present you the supply code. For my instance information, I selected this grouped bar chart of British election outcomes since 1966:
I compiled the dataset of British election history from Wikipedia: the variety of seats within the UK parliament gained by the Conservative, Labour, and Liberal events (broadly outlined) in every election from 1966 to 2019, plus the variety of seats gained by “others.” You can download it as a CSV file.
Matplotlib
Matplotlib is the oldest Python plotting library, and it is nonetheless the preferred. It was created in 2003 as a part of the SciPy Stack, an open supply scientific computing library much like Matlab.
Matplotlib provides you exact management over your plots—for instance, you possibly can outline the person x-position of every bar in your barplot. Here is the code to graph this (which you’ll run here):
import matplotlib.pyplot as plt
import numpy as np
from votes import extensive as df# Initialise a determine. subplots() with no args provides one plot.
fig, ax = plt.subplots()# A bit information preparation
years = df['yr']
x = np.arange(len(years))# Plot every bar plot. Note: manually calculating the 'dodges' of the bars
ax.bar(x - three*width/2, df['conservative'], width, label='Conservative', coloration='#0343df')
ax.bar(x - width/2, df['labour'], width, label='Labour', coloration='#e50000')
ax.bar(x + width/2, df['liberal'], width, label='Liberal', coloration='#ffff14')
ax.bar(x + three*width/2, df['others'], width, label='Others', coloration='#929591')# Customise some show properties
ax.set_ylabel('Seats')
ax.set_title('UK election outcomes')
ax.set_xticks(x) # This ensures we've one tick per yr, in any other case we get fewer
ax.set_xticklabels(years.astype(str).values, rotation='vertical')
ax.legend()# Ask Matplotlib to indicate the plot
plt.present()
And listed here are the election outcomes plotted in Matplotlib:
Seaborn
Seaborn is an abstraction layer on high of Matplotlib; it provides you a very neat interface to make a variety of helpful plot sorts very simply.
It would not compromise on energy, although! Seaborn provides escape hatches to entry the underlying Matplotlib objects, so you continue to have full management.
Seaborn’s code is easier than the uncooked Matplotlib (runnable here):
import seaborn as sns
from votes import lengthy as df# Some boilerplate to initialise issues
sns.set()
plt.determine()# This is the place the precise plot will get made
ax = sns.barplot(information=df, x="year", y="seats", hue="party", palette=['blue', 'crimson', 'yellow', 'gray'], saturation=zero.6)# Customise some show properties
ax.set_title('UK election outcomes')
ax.grid(coloration='#cccccc')
ax.set_ylabel('Seats')
ax.set_xlabel(None)
ax.set_xticklabels(df["year"].distinctive().astype(str), rotation='vertical')# Ask Matplotlib to indicate it
plt.present()
And produces this chart:
Plotly
Plotly is a plotting ecosystem that features a Python plotting library. It has three totally different interfaces:
- An object-oriented interface
- An crucial interface that means that you can specify your plot utilizing JSON-like information buildings
- A high-level interface much like Seaborn referred to as Plotly Express
Plotly plots are designed to be embedded in internet apps. At its core, Plotly is definitely a JavaScript library! It makes use of D3 and stack.gl to attract the plots.
You can construct Plotly libraries in different languages by passing JSON to the JavaScript library. The official Python and R libraries do exactly that. At Anvil, we ported the Python Plotly API to run in the web browser.
Here’s the supply code in Plotly (which you’ll run here):
import plotly.graph_objects as go
from votes import extensive as df# Get a handy checklist of x-values
years = df['yr']
x = checklist(vary(len(years)))# Specify the plots
bar_plots = [
go.Bar(x=x, y=df['conservative'], title='Conservative', marker=go.bar.Marker(coloration='#0343df')),
go.Bar(x=x, y=df['labour'], title='Labour', marker=go.bar.Marker(coloration='#e50000')),
go.Bar(x=x, y=df['liberal'], title='Liberal', marker=go.bar.Marker(coloration='#ffff14')),
go.Bar(x=x, y=df['others'], title='Others', marker=go.bar.Marker(coloration='#929591')),
]# Customise some show properties
structure = go.Layout(
title=go.structure.Title(textual content="Election results", x=zero.5),
yaxis_title="Seats",
xaxis_tickmode="array",
xaxis_tickvals=checklist(vary(27)),
xaxis_ticktext=tuple(df['yr'].values),
)# Make the multi-bar plot
fig = go.Figure(information=bar_plots, structure=structure)# Tell Plotly to render it
fig.present()
And the election outcomes plot:
Bokeh
Bokeh (pronounced “BOE-kay”) focuses on constructing interactive plots, so this commonplace instance would not present it off to its greatest. Like Plotly, Bokeh’s plots are designed to be embedded in internet apps; it outputs its plots as HTML recordsdata.
Here is the code in Bokeh (which you’ll run here)
from bokeh.io import present, output_file
from bokeh.fashions import ColumnDataSource, FactorRange, HoverTool
from bokeh.plotting import determine
from bokeh.rework import factor_cmap
from votes import lengthy as df# Specify a file to put in writing the plot to
output_file("elections.html")# Tuples of teams (yr, occasion)
x = [(str(r[1]['yr']), r[1]['occasion']) for r in df.iterrows()]
y = df['seats']# Bokeh wraps your information in its personal objects to help interactivity
supply = ColumnDataSource(information=dict(x=x, y=y))# Create a colourmap
cmap =
'Conservative': '#0343df',
'Labour': '#e50000',
'Liberal': '#ffff14',
'Others': '#929591',
fill_color = factor_cmap('x', palette=checklist(cmap.values()), elements=checklist(cmap.keys()), begin=1, finish=2)# Make the plot
p = determine(x_range=FactorRange(*x), width=1200, title="Election results")
p.vbar(x='x', high='y', width=zero.9, supply=supply, fill_color=fill_color, line_color=fill_color)# Customise some show properties
p.y_range.begin = zero
p.x_range.range_padding = zero.1
p.yaxis.axis_label = 'Seats'
p.xaxis.major_label_orientation = 1
p.xgrid.grid_line_color = None
And the plot:
Altair
Altair is predicated on a declarative plotting language (or “visualization grammar”) referred to as Vega. This means it is a well-thought-through API that scales properly for advanced plots, saving you from getting misplaced in nested-for-loop hell.
As with Bokeh, Altair outputs its plots as HTML recordsdata. Here’s the code (which you’ll run here):
import altair as alt
from votes import lengthy as df# Set up the colourmap
cmap =
'Conservative': '#0343df',
'Labour': '#e50000',
'Liberal': '#ffff14',
'Others': '#929591',
# Cast years to strings
df['yr'] = df['yr'].astype(str)# Here's the place we make the plot
chart = alt.Chart(df).mark_bar().encode(
x=alt.X('occasion', title=None),
y='seats',
column=alt.Column('yr', type=checklist(df['yr']), title=None),
coloration=alt.Color('occasion', scale=alt.Scale(area=checklist(cmap.keys()), vary=checklist(cmap.values())))
)# Save it as an HTML file.
chart.save('altair-elections.html')
And the ensuing chart:
Pygal
Pygal focuses on visible look. It produces SVG plots by default, so you possibly can zoom them perpetually or print them out with out them getting pixellated. Pygal plots additionally include some good interactivity options built-in, making Pygal one other underrated candidate in the event you’re seeking to embed plots in an internet app.
The supply code appears like this (and you’ll run it here):
import pygal
from pygal.type import Style
from votes import extensive as df# Define the type
custom_style = Style(
colours=('#0343df', '#e50000', '#ffff14', '#929591')
font_family='Roboto,Helvetica,Arial,sans-serif',
background='clear',
label_font_size=14,
)# Set up the bar plot, prepared for information
c = pygal.Bar(
title="UK Election Results",
type=custom_style,
y_title='Seats',
width=1200,
x_label_rotation=270,
)# Add 4 information units to the bar plot
c.add('Conservative', df['conservative'])
c.add('Labour', df['labour'])
c.add('Liberal', df['liberal'])
c.add('Others', df['others'])# Define the X-labels
c.x_labels = df['yr']# Write this to an SVG file
c.render_to_file('pygal.svg')
And the chart:
Pandas
Pandas is a particularly widespread information science library for Python. It means that you can do all kinds of knowledge manipulation scalably, however it additionally has a handy plotting API. Because it operates immediately on information frames, the pandas instance is probably the most concise code snippet on this article—even shorter than the Seaborn code!
The pandas API is a wrapper round Matplotlib, so it’s also possible to use the underlying Matplotlib API to get fine-grained management of your plots.
Here’s the election outcomes plot in pandas. The code is fantastically concise!
from matplotlib.colours import ListedColormap
from votes import extensive as dfcmap = ListedColormap(['#0343df', '#e50000', '#ffff14', '#929591'])
ax = df.plot.bar(x='yr', colormap=cmap)
ax.set_xlabel(None)
ax.set_ylabel('Seats')
ax.set_title('UK election outcomes')plt.present()
And the ensuing chart:
To run this instance, take a look at here.
Plot your means
Python affords some ways to plot the identical information with out a lot code. While you may get began shortly creating charts with any of those strategies, they do take some native configuration. Anvil affords a good looking web-based expertise for Python improvement in the event you’re in want. Happy plotting!
This article is predicated on Plotting in Python: comparing the options on Anvil’s weblog and is reused with permission.