Recently, the microSD (safe digital) card in my Raspberry Pi stopped working. It had been in fixed use as a server for nearly two years, and this offered a very good alternative to begin recent and proper a number of issues. After its preliminary set up, it started experiencing disk issues and the official Raspberry Pi working system (OS) acquired a major replace (and was renamed from Raspbian to Raspberry Pi OS). So I acquired a brand new microSD card and preceded to rebuild.
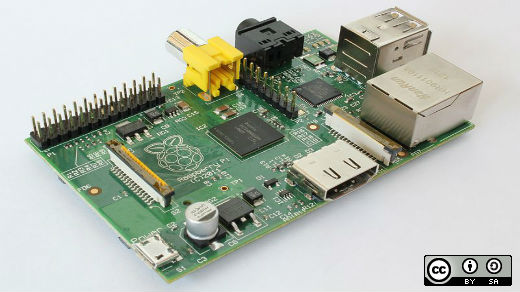
Although this Raspberry Pi three Model B is not the newest hardware, it’s nonetheless sufficient for working a minimal server for varied providers. I believe my unique set up used the complete working system picture that features the graphical person interface and loads of different software program packages pointless for my wants.
This step-by-step information exhibits how I arrange my Raspberry Pi with essentially the most minimal configuration to preserve valuable system assets.
Get began
To start, create a brand new working system drive for the Pi. This requires two issues: an OS picture file and a microSD card.
Download the Raspberry Pi OS picture file
While a number of working programs can be found, I selected to stay to the formally supported OS.
The first step is to obtain the most recent OS picture file from the official Raspberry Pi OS website to a pc you need to use to jot down to a microSD card. Three completely different photos are provided, and I selected the Raspberry Pi OS Lite. It is the smallest OS and consists of solely the important information required for a base OS, so it’ll devour the least quantity of disk house and system RAM. (When I downloaded the OS, the discharge date was August 20, 2020, nevertheless it has been up to date since then. I don’t anticipate any main variations, however as all the time, I like to recommend studying the discharge notes.)
Write the OS to the microSD Card
The second step is to jot down the downloaded OS picture file to the microSD card. My card was used beforehand, and once I inserted it into my Linux desktop, it robotically mounted its two present partitions. I could not write the picture till I unmounted these partitions. To accomplish that, I needed to decide their path with the lsblk command, which recognized the gadget as /dev/mmcblk0:
# lsblk -pI then unmounted the partitions with the umount command:
# umount /dev/mmcblk0p2
# umount /dev/mmcblk0p1
Once the partitions are unmounted, write the picture file to the microSD card. Although there are numerous graphical image-writing instruments out there, I used the venerable dd command:
# dd bs=4M if=/residence/alan/Downloads/raspios/2020-08-20-raspios-buster-armhf-lite.img of=/dev/mmcblk0 standing=progress conv=fsyncBoot the Pi
You simply want a monitor, keyboard, and energy adapter to entry the Raspberry Pi. I even have an Ethernet cable for community connectivity, which I favor over wi-fi—particularly for a devoted server.
Insert the microSD card and energy on the Pi. Once it boots, log in with the default credentials: person pi and password raspberry.
Configure the OS
Take the next steps to attenuate your set up, disk house, and reminiscence utilization as a lot as attainable. I like to recommend spending time to analysis every configuration to be as right as attainable. There are sometimes a number of methods to use a configuration, and configuration information and directives might be deprecated. Always overview a product’s documentation to make sure you’re not making use of an outdated configuration.
Run raspi-config
The essential configuration program in Raspberry Pi OS known as raspi-config. Run it instantly after logging in:
# raspi-configIt presents an choice to broaden the basis filesystem to make use of the entire out there house on the microSD card. After taking this feature, reboot and log in once more.
Verify that the cardboard’s full capability is getting used with the df command:
# df -hIf it is advisable to configure different choices, run raspi-config once more. Some of those will range in line with your necessities or preferences. Go by means of all of them simply to make sure you do not miss something. I like to recommend the next modifications for greatest efficiency. (I’ll skip the sections the place I didn’t make any modifications.)
- System choices: You can set the hostname, ideally utilizing a completely certified area title (FQDN). You may also change your password right here, which is all the time extremely really useful.
- Interface choices: Enable SSH.
- Performance choices: Reduce GPU reminiscence to the bottom setting (16MB).
- Localization choices: Choose your time zone, location, and keyboard sort.
- Advanced choices: This part comprises the Expand Filesystem choice to broaden the basis filesystem. If you did not do that above, remember to do it right here so that you’ve entry to all storage out there on the microSD card.
- Update: Entering the Update part instantly checks for an replace to the raspi-config software. If an replace is obtainable, it is going to be downloaded and utilized. Otherwise, raspi-config will re-launch after a number of seconds.
Once you full these configurations in raspi-config, choose Finish to exit the software.
Manual configurations
There are a number of different modifications that I like to recommend. They are all handbook modifications that require modifying sure configuration information.
Configure static IP
Generally, it’s best to configure a server with a static IP deal with. To configure the IP and your default gateway (router) and area title service (DNS) addresses, start by figuring out the community interface gadget with the ip command:
# ip hyperlink
1: lo: <LOOPBACK,UP,LOWER_UP> mtu 65536 qdisc noqueue state UNKNOWN mode DEFAULT group default qlen 1000
    hyperlink/loopback 00:00:00:00:00:00 brd 00:00:00:00:00:00
2: eth0: <BROADCAST,MULTICAST,UP,LOWER_UP> mtu 1500 qdisc pfifo_fast state UP mode DEFAULT group default qlen 1000
    hyperlink/ether b8:27:eb:48:3f:46 brd ff:ff:ff:ff:ff:ff
You additionally have to know the IP deal with of your default gateway and a number of DNS servers. Add this data to the file /and many others/dhcpcd.conf (I strongly counsel making a backup of this file earlier than making modifications):
# cd /and many others
# cp -a dhcpcd.conf dhcpcd.conf.unique
Edit the file as proven:
# vi dhcpcd.conf# static IP configuration:
interface eth0
static ip_address=192.168.1.5/24
static routers=192.168.1.1
static domain_name_servers=192.168.1.three 192.168.1.four
Disable IPv6
Unless you particularly want to make use of IPv6, you would possibly favor to disable it. Do this by creating two new information that embrace a one-line directive instructing the Linux kernel to not use IPv6.
First, create the file /and many others/sysctl.d/disable-ipv6.conf with the roadinternet.ipv6.conf.all.disable_ipv6 = 1:
# cd /and many others/sysctl.d
# echo "net.ipv6.conf.all.disable_ipv6 = 1" > disable-ipv6.conf
Then create the file /and many others/modprobe.d/blacklist-ipv6.conf with the road blacklist ipv6:
# cd /and many others/modprobe.d
# echo "blacklist ipv6" > blacklist-ipv6.conf
Disable WiFi, Bluetooth, and audio
My server’s particular objective is not going to want Bluetooth or audio. Also, because it’s linked with Ethernet, it is not going to use wi-fi (WiFi). Unless you intend to make use of them, disable them with the next steps.
Make the next modifications to the file /boot/config.txt (once more, I counsel making a backup of this file):
# cd /boot
# cp -a config.txt config.txt.unique
Add the next two directives to the underside of the file to disable Bluetooth and WiFi:
dtoverlay=disable-btdtoverlay=disable-wifi
These echo instructions will do the trick:
# cd /boot
# echo "dtoverlay=disable-bt" >> config.txt
# echo "dtoverlay=disable-wifi" >> config.txt
To disable audio, change the parameter dtparam=audio to off. You can do that with a brief sed command:
# sed -i '/dtparam=audio/c dtparam=audio=off' config.txtThe final step is to disable the WiFi service. Use the systemctl masks command:
systemctl masks wpa_supplicant.serviceYou can disable a few different providers in the event you will not want them:
Final steps
- Check your reminiscence utilization:
# free -hI used to be astonished: My OS solely makes use of 30MB of RAM.
- Create private accounts: It is advisable to create person accounts for any people who will log into this server. You can assign them to the sudo group to permit them to problem administrative instructions. For instance, to offer a person named George an account:
# adduser george
# usermod -a -G adm,sudo,customers george - Get updates: This is a crucial step. Apply updates to get the newest fixes to the Raspberry Pi OS:
# apt replace
# apt full-upgrade - Reboot: It’s a good suggestion to reboot your new server:
# systemctl reboot - Install Cockpit: You can set up Cockpit, also called the Linux Web Console, on Raspberry Pi OS. It gives an HTML-based interface for managing and monitoring your server remotely. I just lately wrote about getting started with Cockpit. Install it with:
# apt set up cockpit
Now my Raspberry Pi is able to host a server. I may use it for a web server, a VPN server, a sport server comparable to Minetest, or (as I did) an ad blocker based on Pi-Hole.
Keep outdated hardware alive
Regardless of what hardware you’ve got out there, rigorously minimizing and controlling your working system and packages can maintain your useful resource utilization low with the intention to get essentially the most out of it. This additionally improves safety by lowering the variety of providers and packages out there to would-be mal-actors making an attempt to take advantage of a vulnerability.
So, earlier than you decommission older hardware, think about all the chances for the way it can proceed for use.